
A Flat Bush Home Renovation 25 Years in the Making
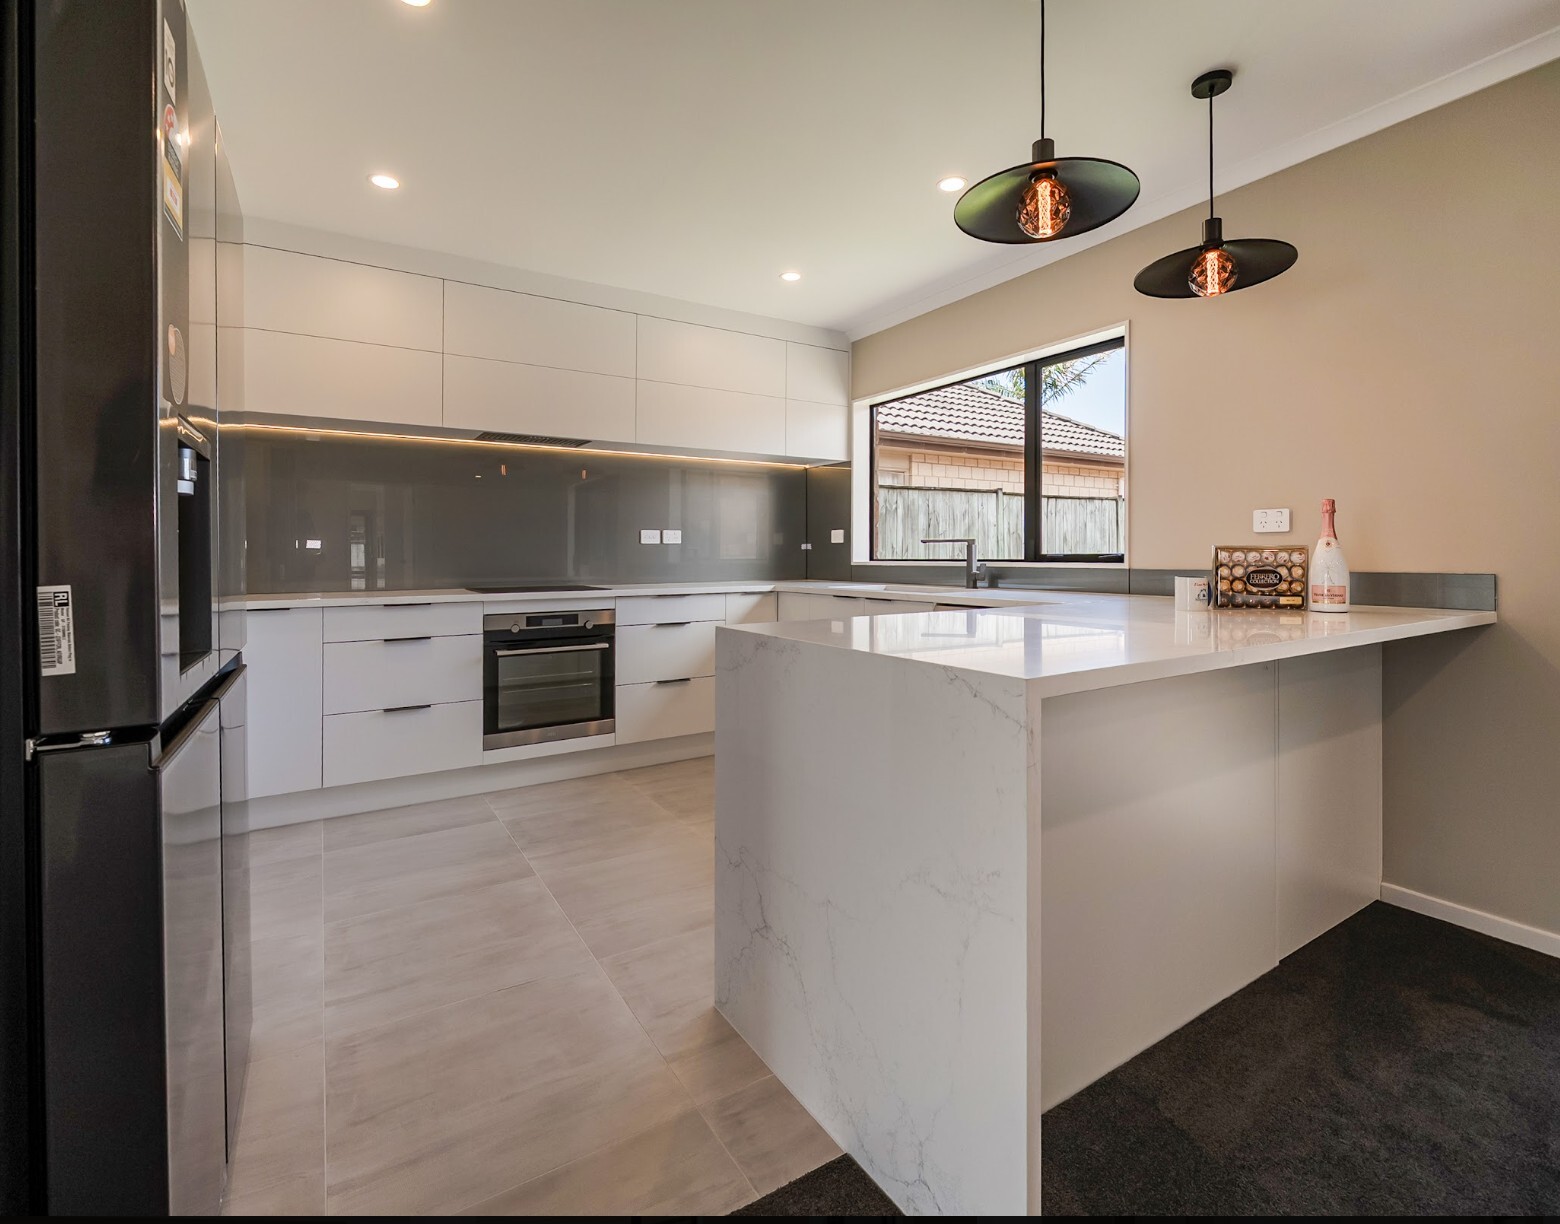
When this Flat Bush couple bought their new brick-and-tile home in 2000, its kitchen and bathrooms were exactly what they needed. Twenty-five years later, they were still living in the same house, with the same original kitchen and bathrooms. The home itself had held up well. It was the everyday details that had begun to wear on them.
The ensuite door swung into an already small room. The corner shower felt cramped. In the kitchen, the awkward pantry made it hard to see what was stored at the back, and there was too little usable bench space. A simple laundry tub and basic wardrobe shelving were also on the list of things they wanted to improve. What started as a conversation about updating the ensuite grew into a plan to renovate much more of the home.
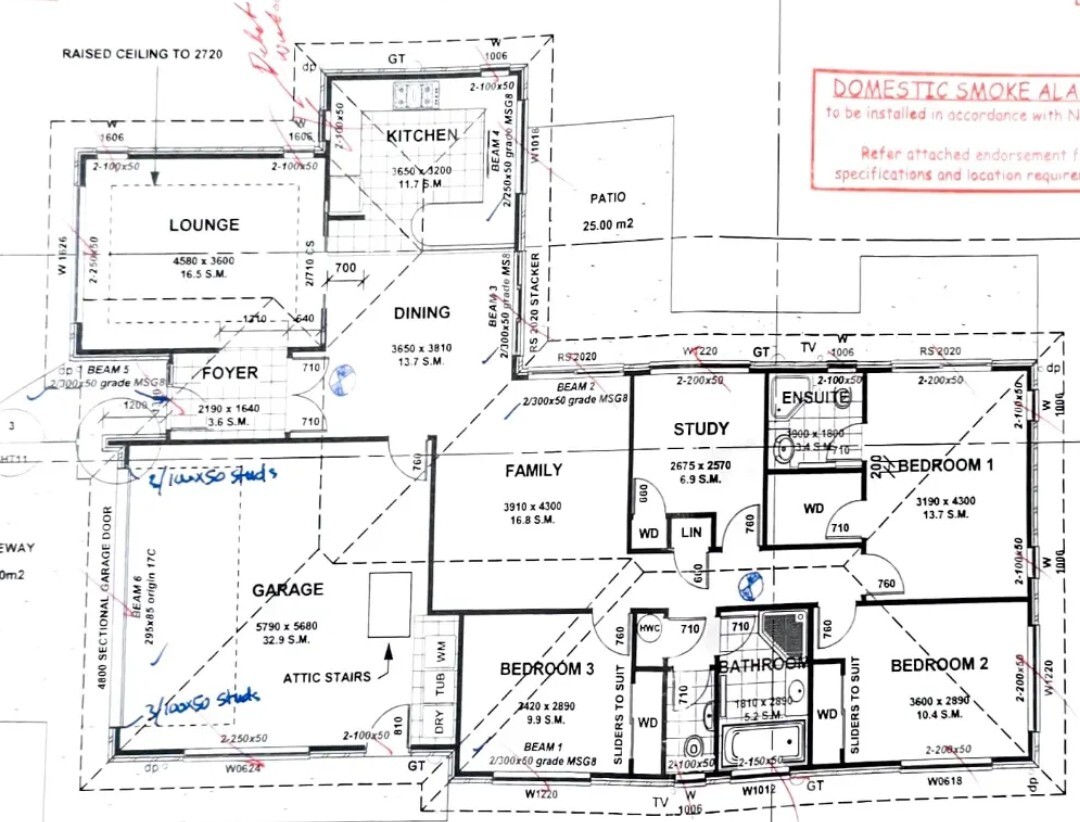
For James Goren and The Renovation Team, the question was how to make the house work better without changing a layout the owners still liked. The answer lay in a series of carefully planned changes, from the position of a kitchen door to the size and swing of bathroom fittings. This Flat Bush home is one example of the home renovations we deliver across South Auckland.
One renovation or several separate projects?
At first, the owners considered renovating the bathrooms and kitchen in stages while continuing to live at home. It was understandable. Moving out for a renovation takes planning, and tackling each room separately can feel easier to manage.
But the wish list had grown beyond a single room. The kitchen, bathrooms, laundry, wardrobes, flooring, lighting, painting and garage storage all needed attention. Doing them one by one would mean repeated periods of trades coming and going, with dust and disruption each time. James recommended planning the work as one project.
As he put it,
“Do it once, do it right, and get it over with.”
The owners arranged temporary accommodation for approximately 11 weeks while the work was carried out. The team spent about two months planning the project before construction began, working through the scope, measurements, products and order of work. For homeowners weighing up whether to stay on site, our guide to living at home during a renovation explores the practical trade-offs.
A kitchen that uses its space better
James calls the kitchen the biggest transformation in the house. Its walls did not need to be knocked down to achieve it. Instead, the team examined where space was being lost and what the owners needed to store and use every day.
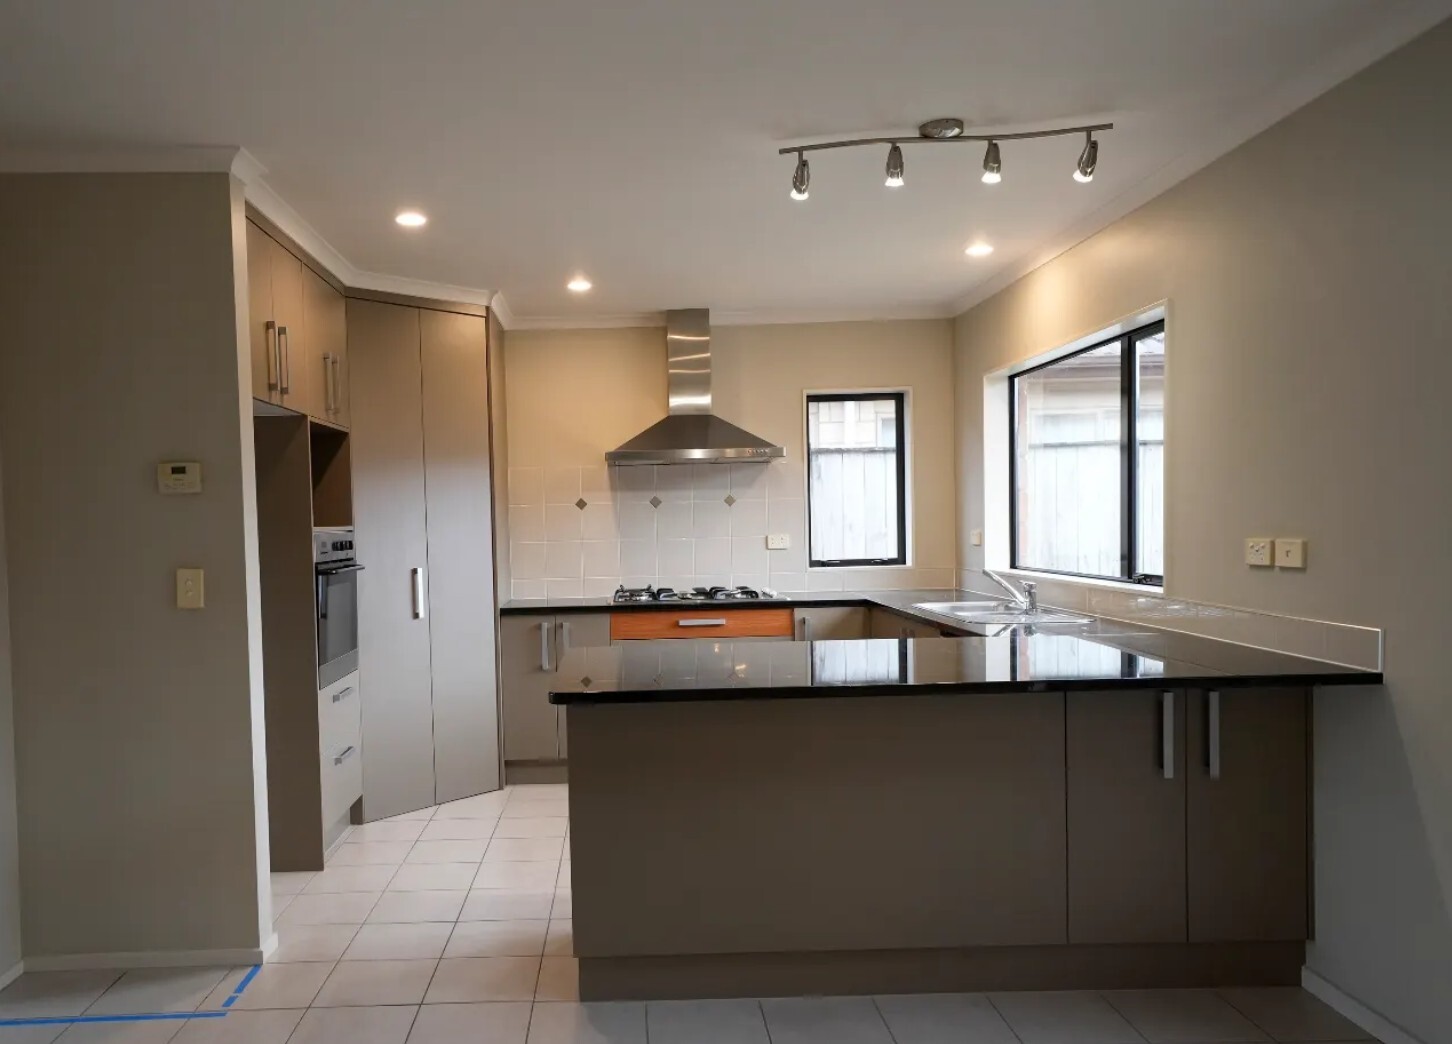
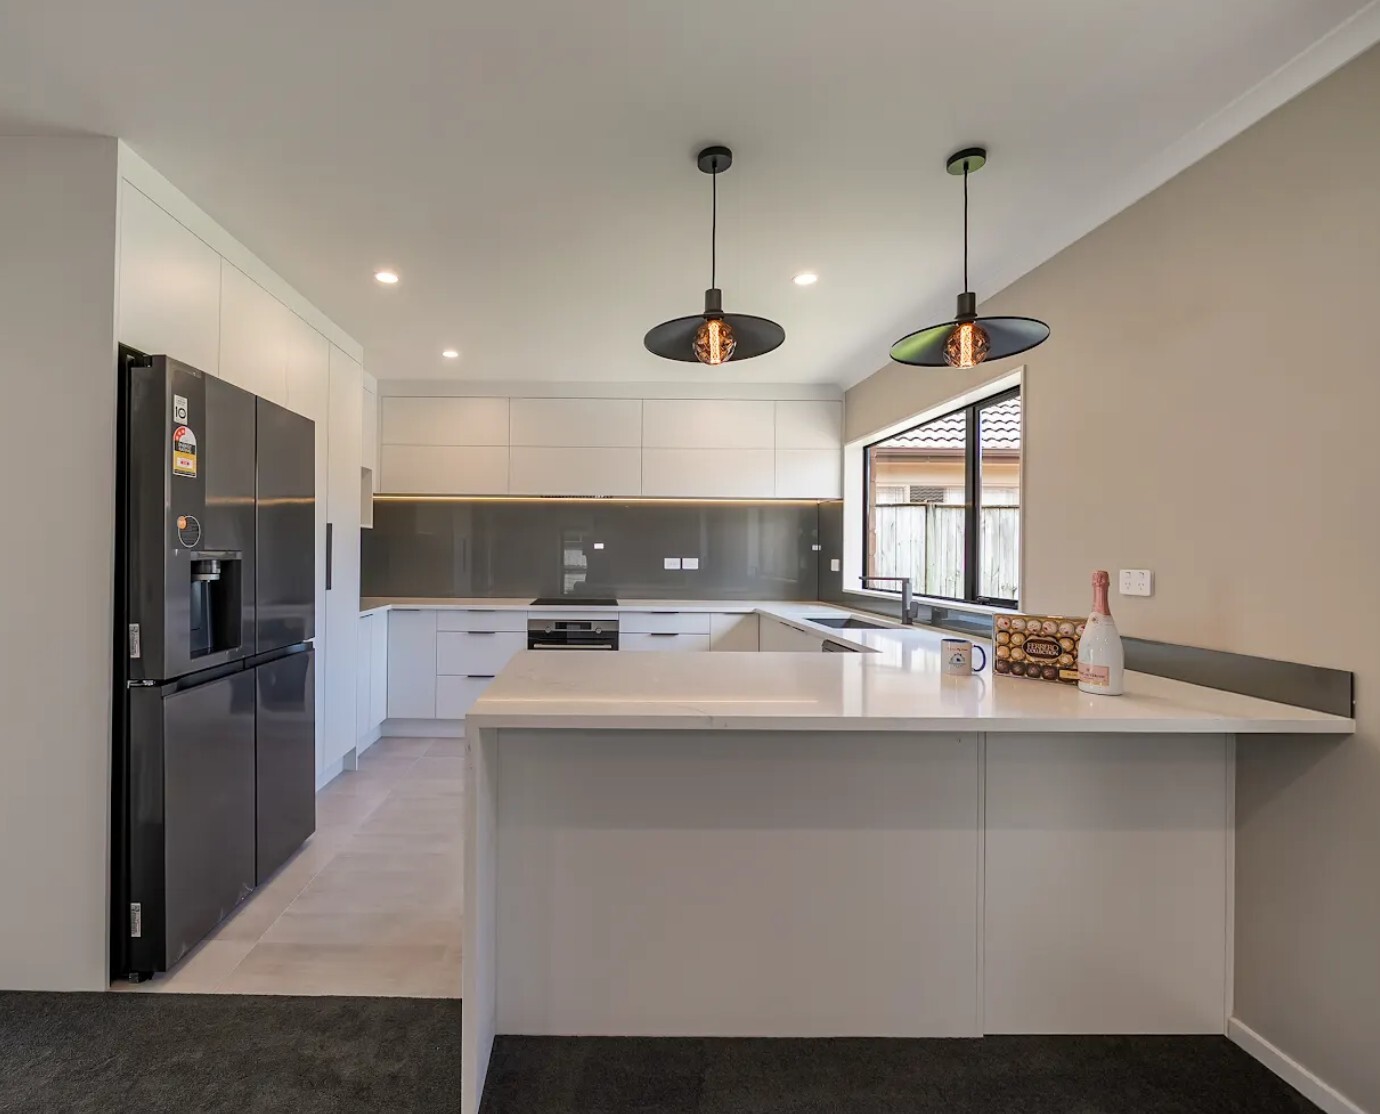 Use the left and right arrow keys to compare. Home shows the after photo. End shows the before photo.
 The old diamond-shaped walk-in pantry looked generous from the outside, but items could disappear behind one another. In its place, a two-door pantry with drawers made the storage easier to see and reach. Moving the oven beneath the cooktop freed up more room for pantry storage, while a benchtop that wraps around the corner added a usable work surface.
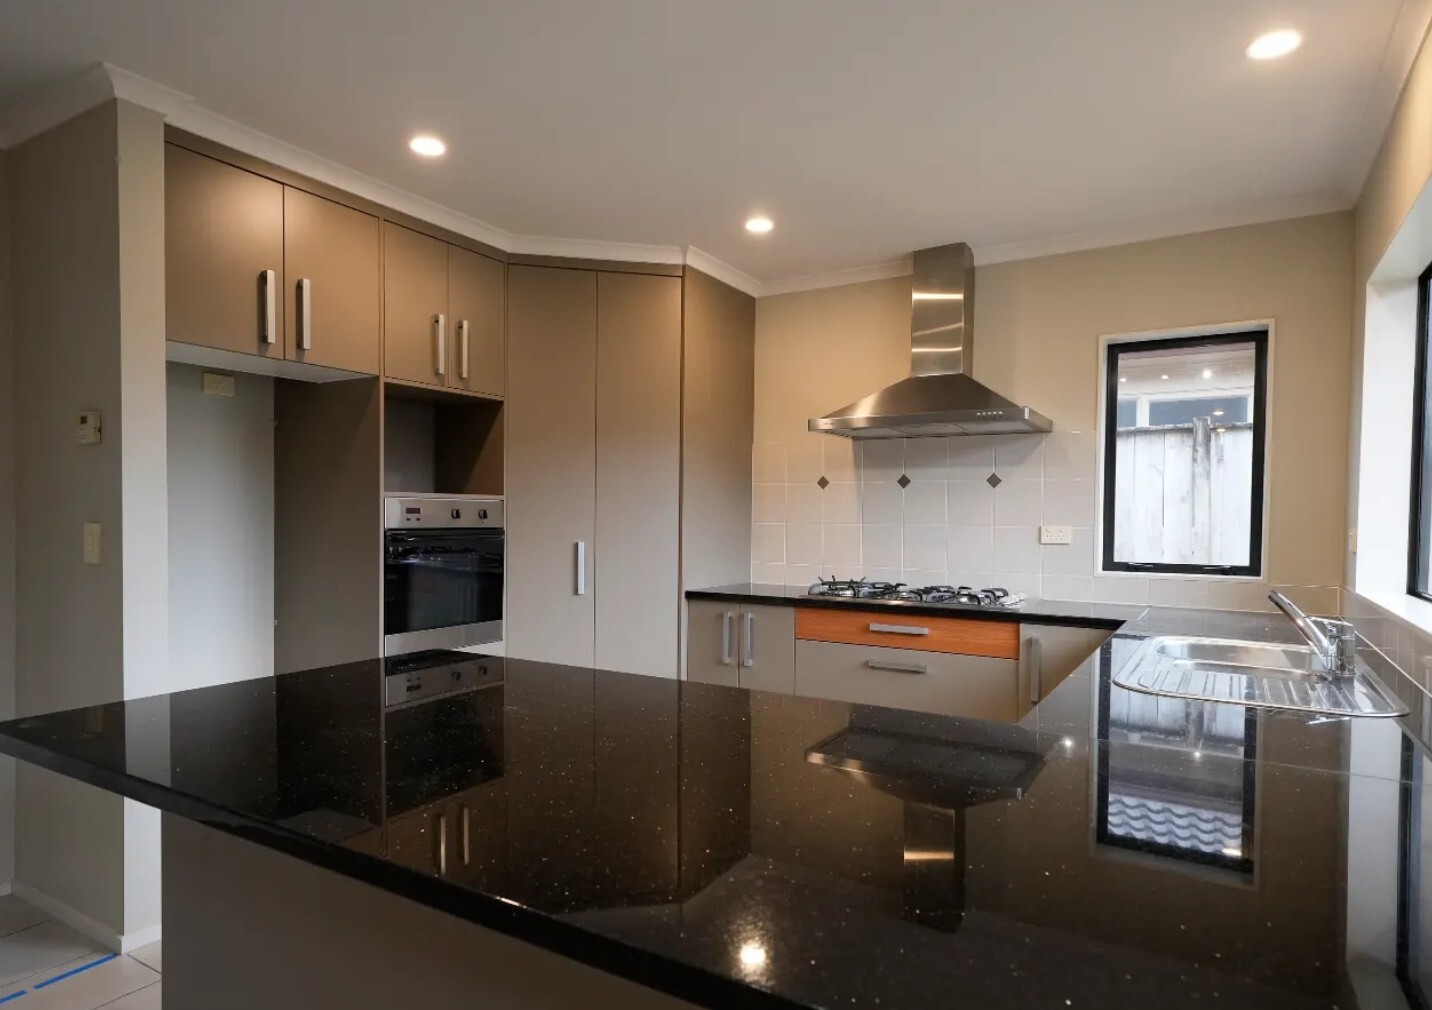
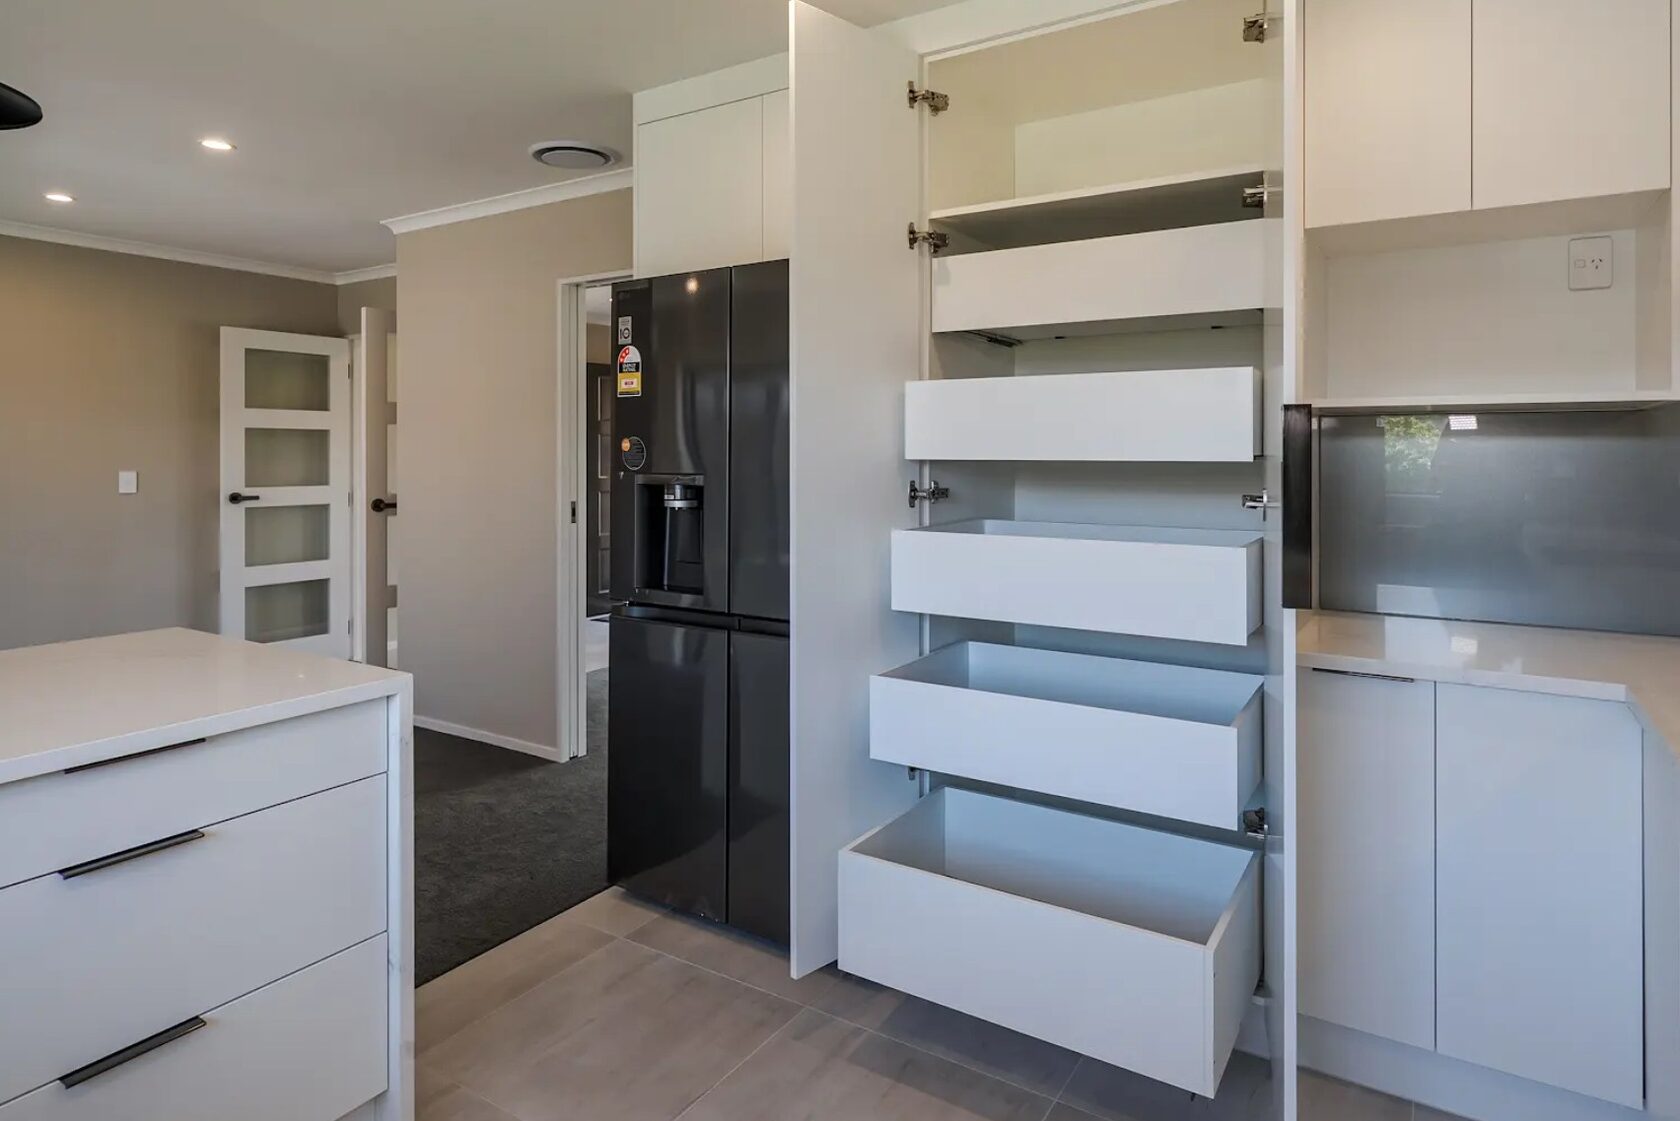 Use the left and right arrow keys to compare. Home shows the after photo. End shows the before photo.
 An internal window was closed off, allowing a continuous glass splashback behind the bench. A new cavity sliding door also gave the kitchen roughly 20 to 30 centimetres more usable space, enough to help accommodate a double-door fridge. Each adjustment was modest on its own. Together, they made the kitchen more practical without a major structural redesign.
“The kitchen actually became bigger in the same footprint,” James says. That is the useful lesson here for Auckland homeowners with a kitchen that feels too small: first look at doors, appliances, corners and storage before assuming the room itself needs to grow. Our Auckland kitchen renovation guide covers more of the decisions to consider when planning a new layout.
Small bathroom changes with a daily payoff
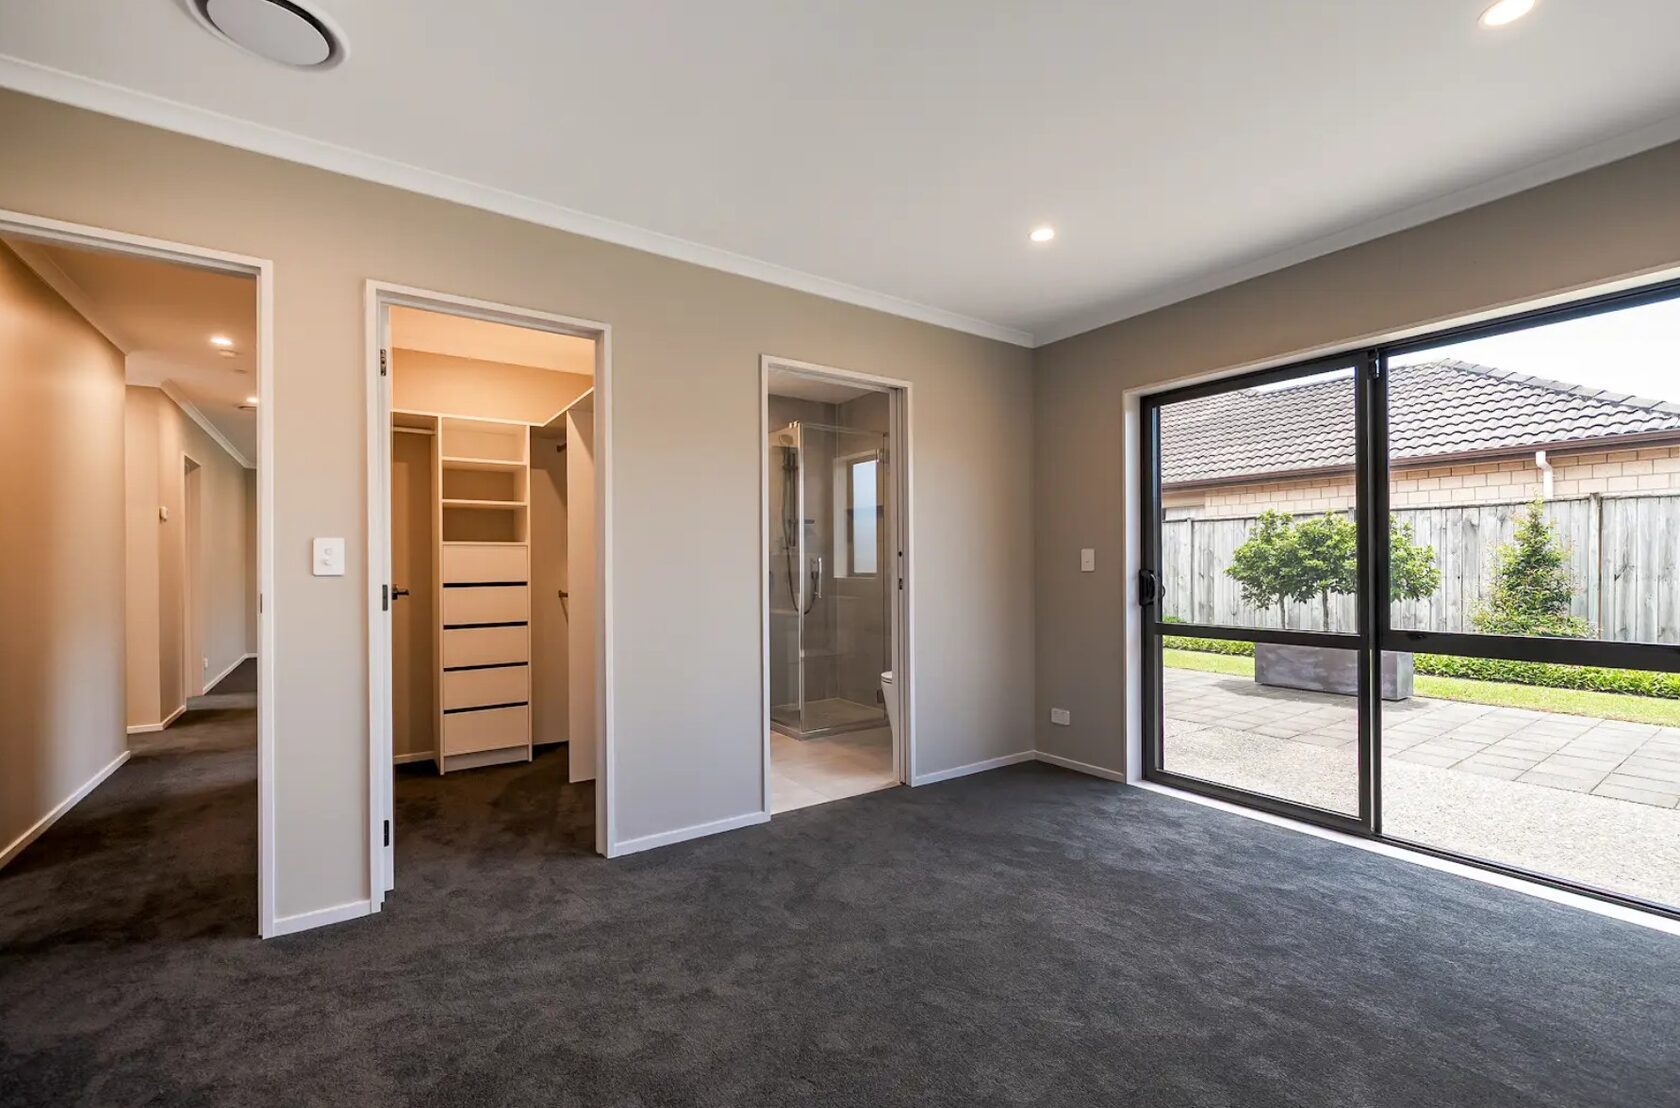
The ensuite presented a different challenge. There was little room to spare, and its inward-opening door took up space whenever someone entered. Replacing it with a cavity slider freed up the floor area. The narrow diamond-shaped corner shower gave way to a 900 × 900 mm square shower, with a recessed niche for shampoo and other essentials.
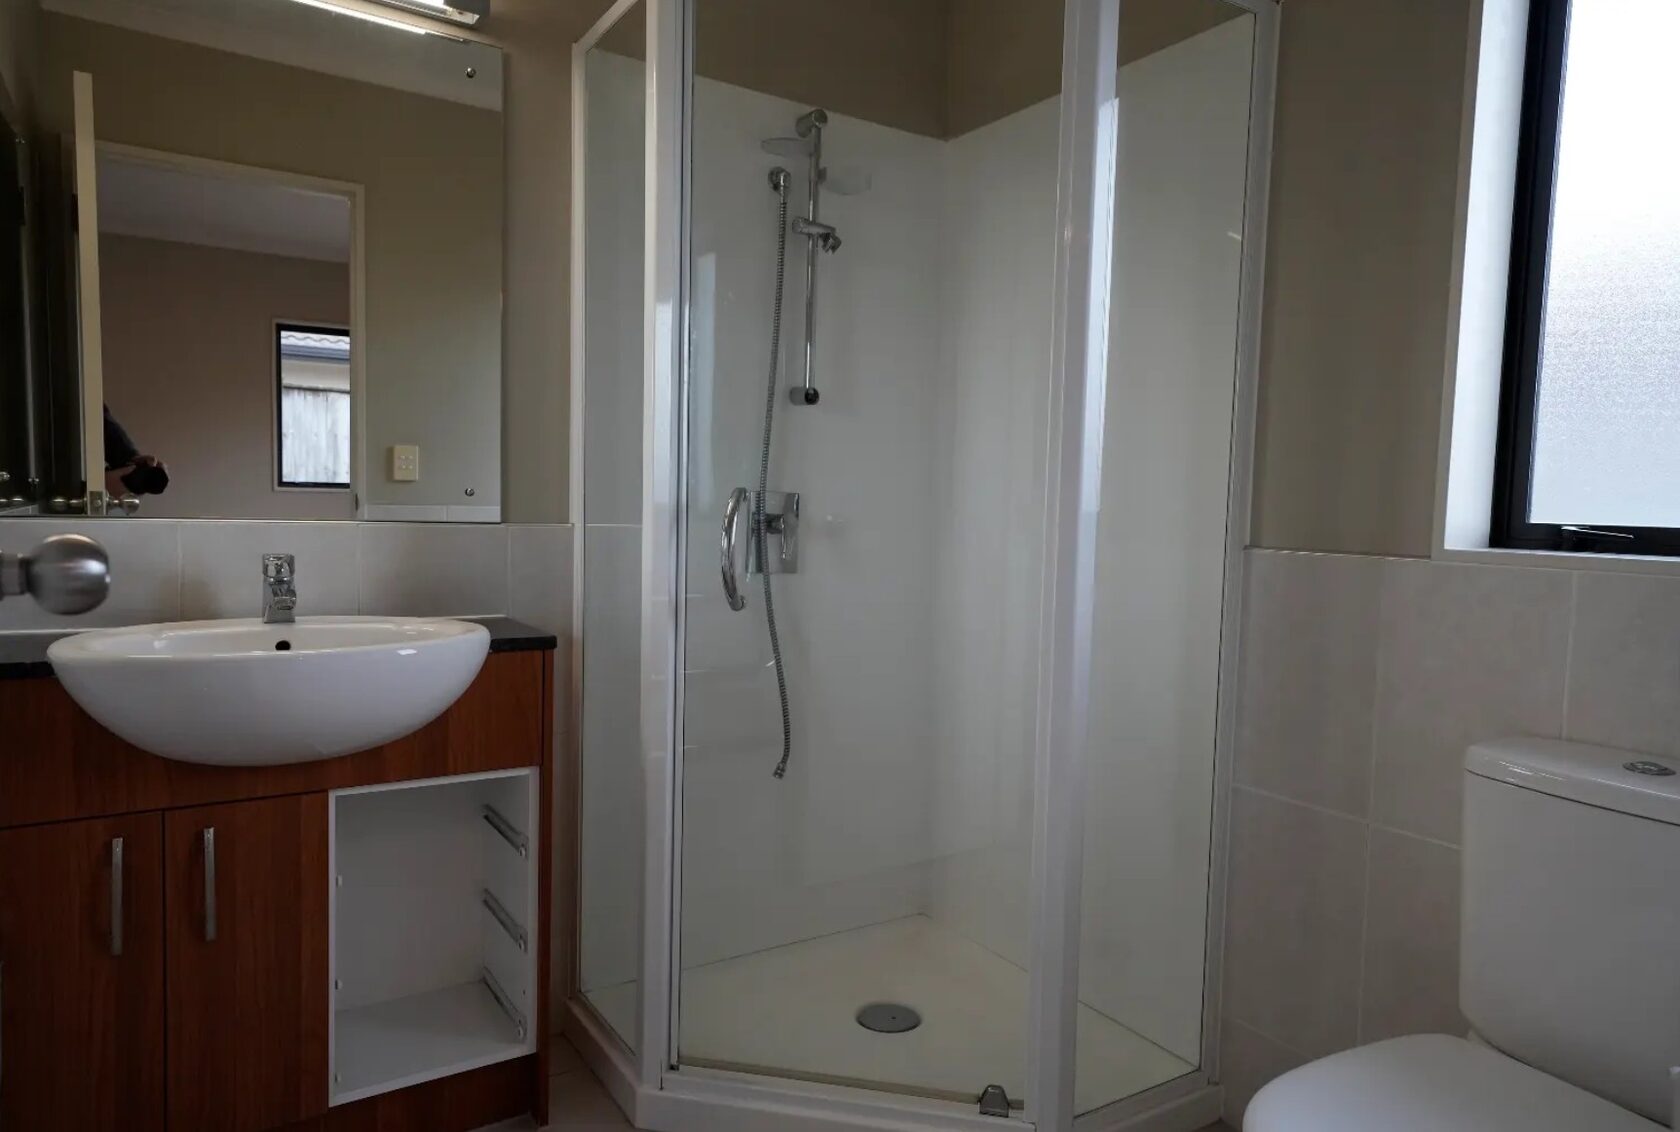
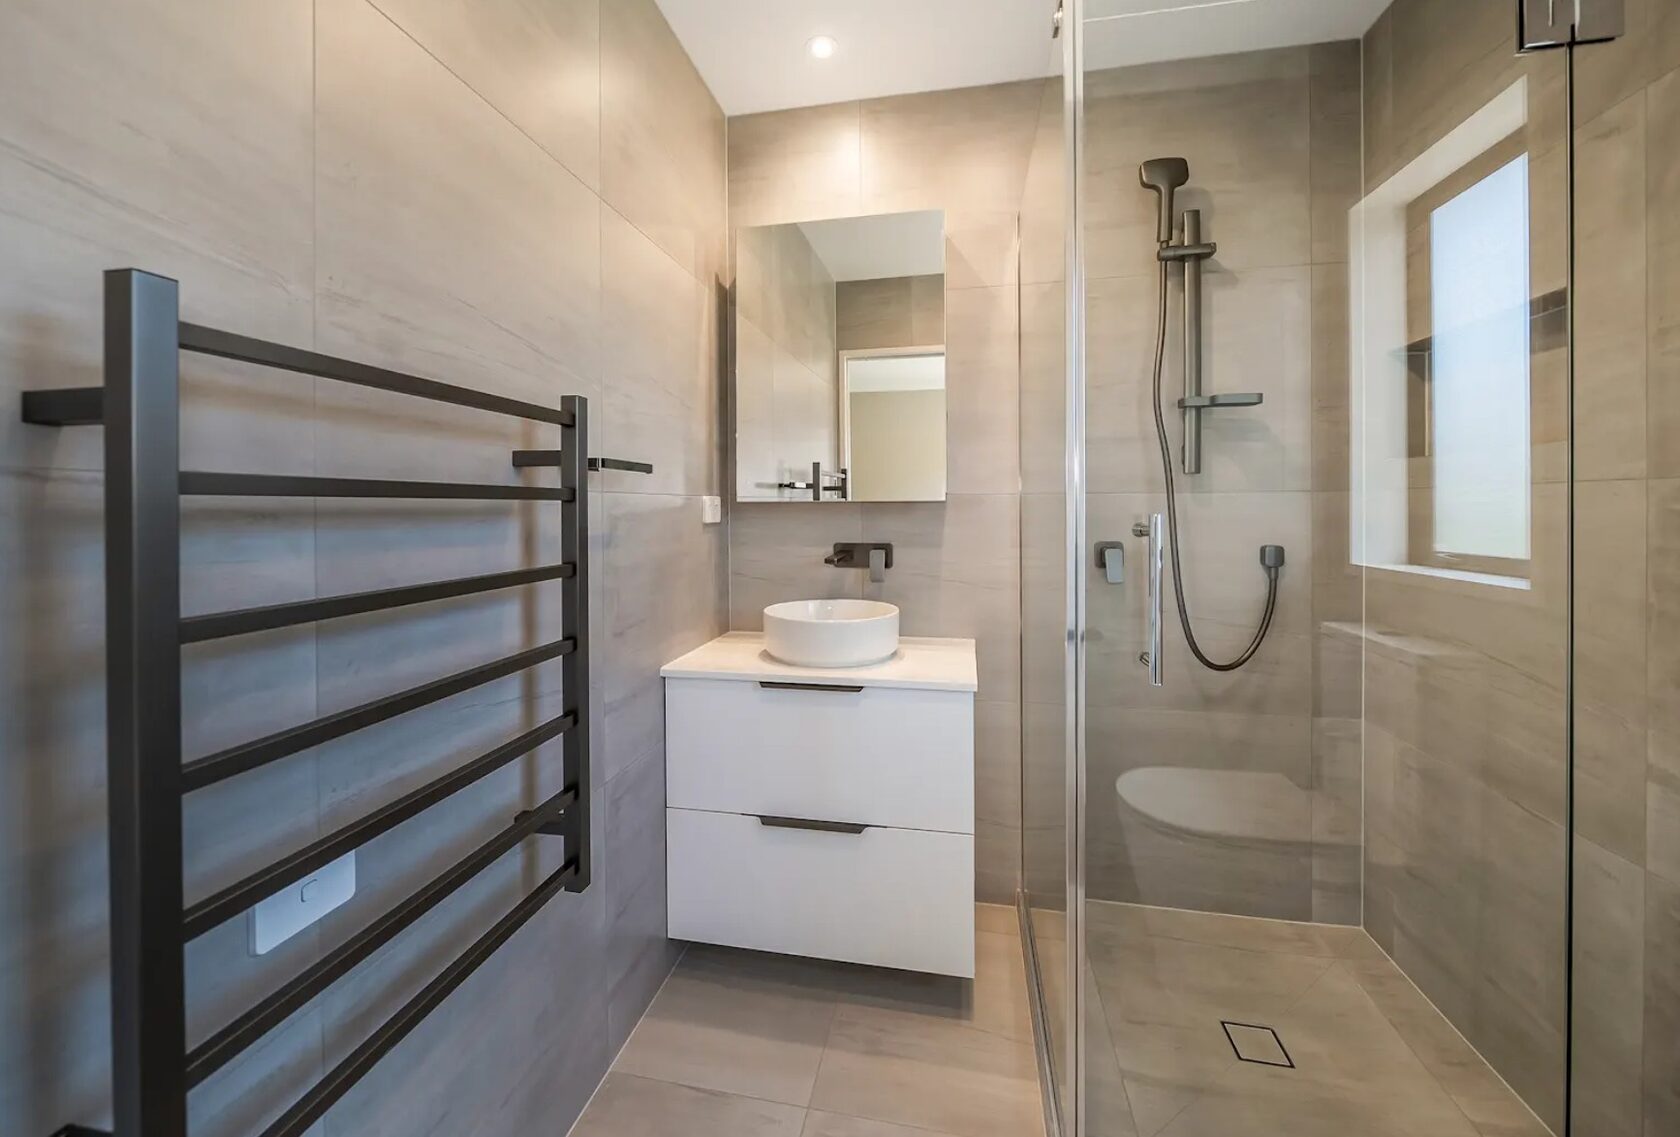 Use the left and right arrow keys to compare. Home shows the after photo. End shows the before photo.
 The wider bathroom work was planned just as carefully. A square shower and freestanding bath were included in the main bathroom. James describes the behind-the-scenes work as checking that the doors, shower screens, toilets and vanities would all fit and clear one another. A bathroom drawing can look fine until a door opens into a fixture or leaves too little room to move. Those measurements mattered more than any single finish.
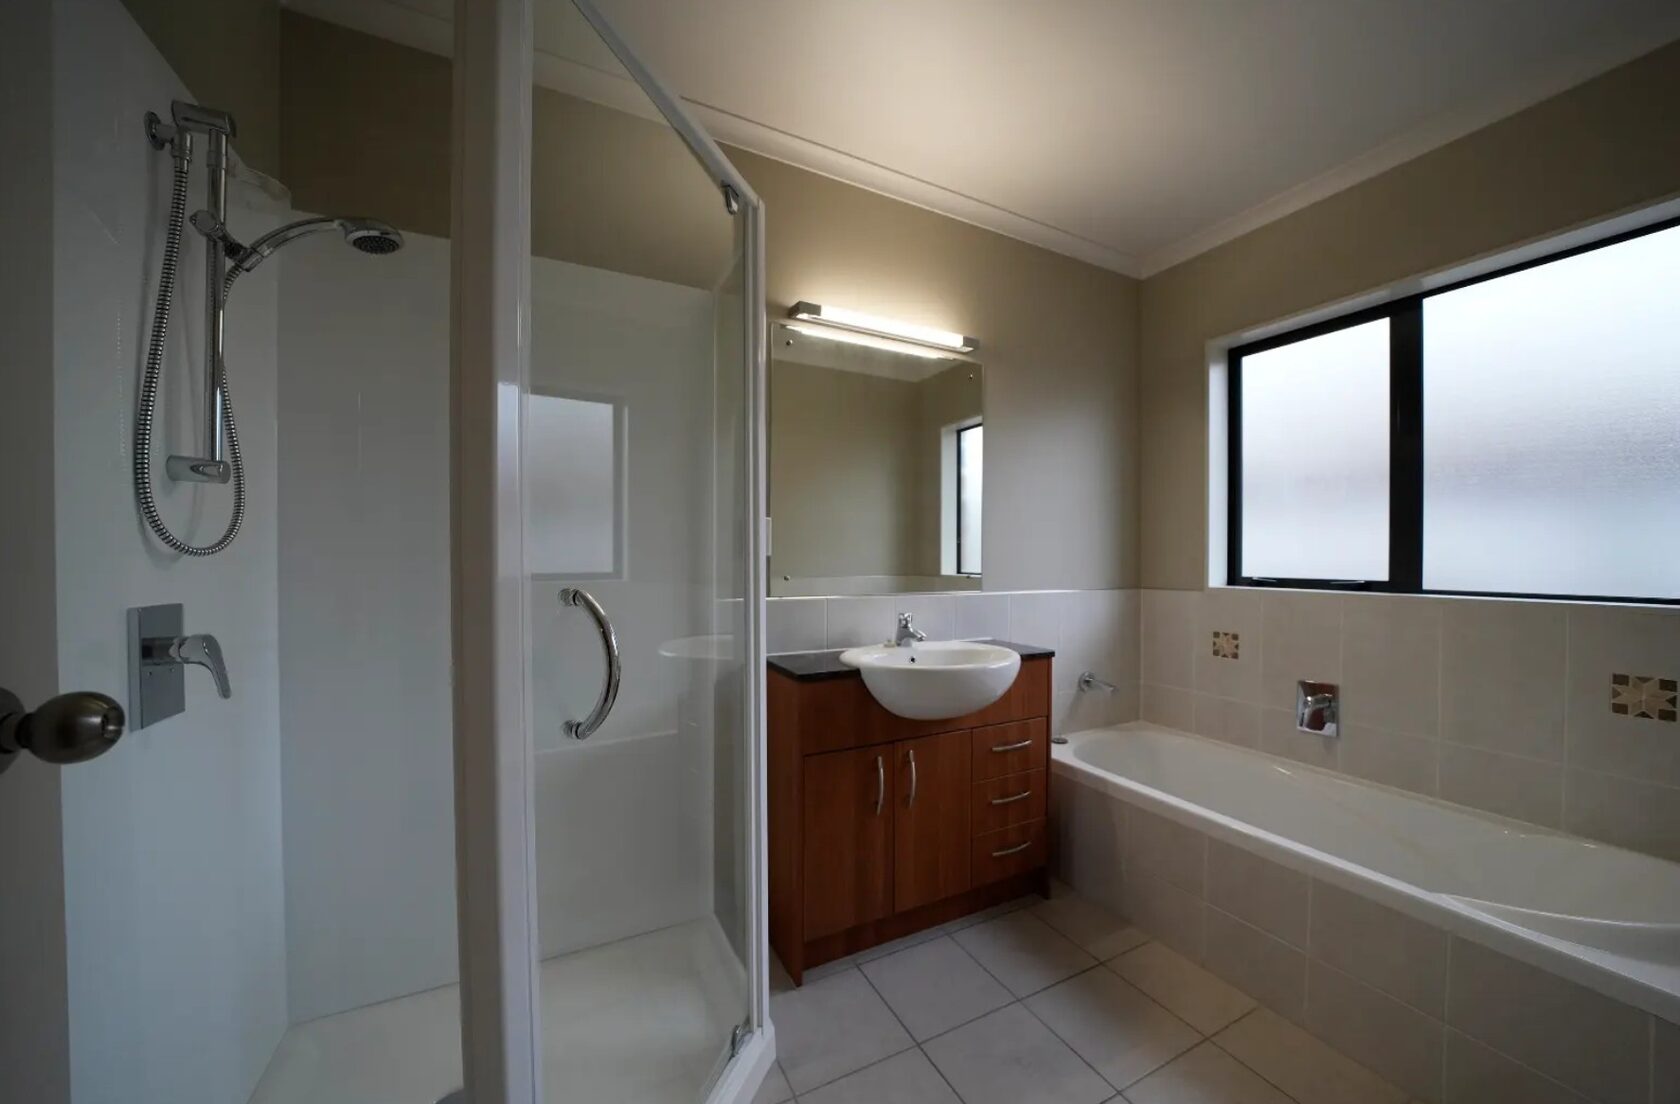
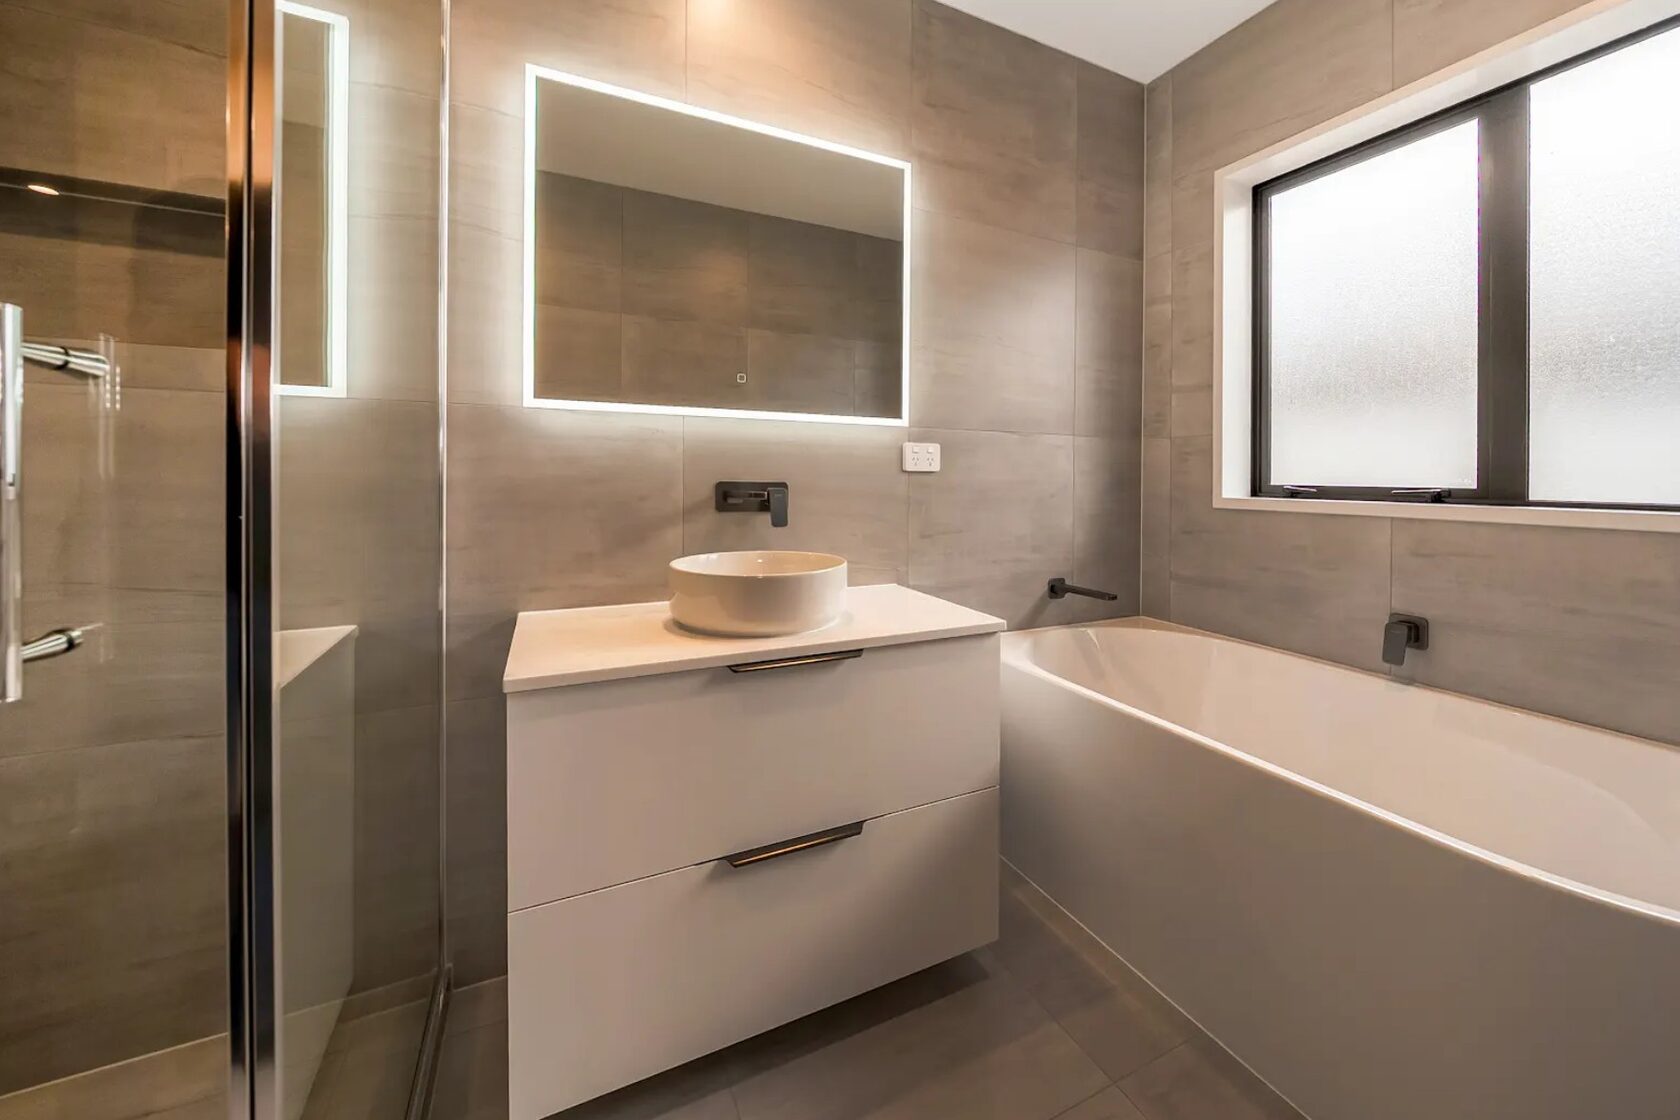 Use the left and right arrow keys to compare. Home shows the after photo. End shows the before photo.
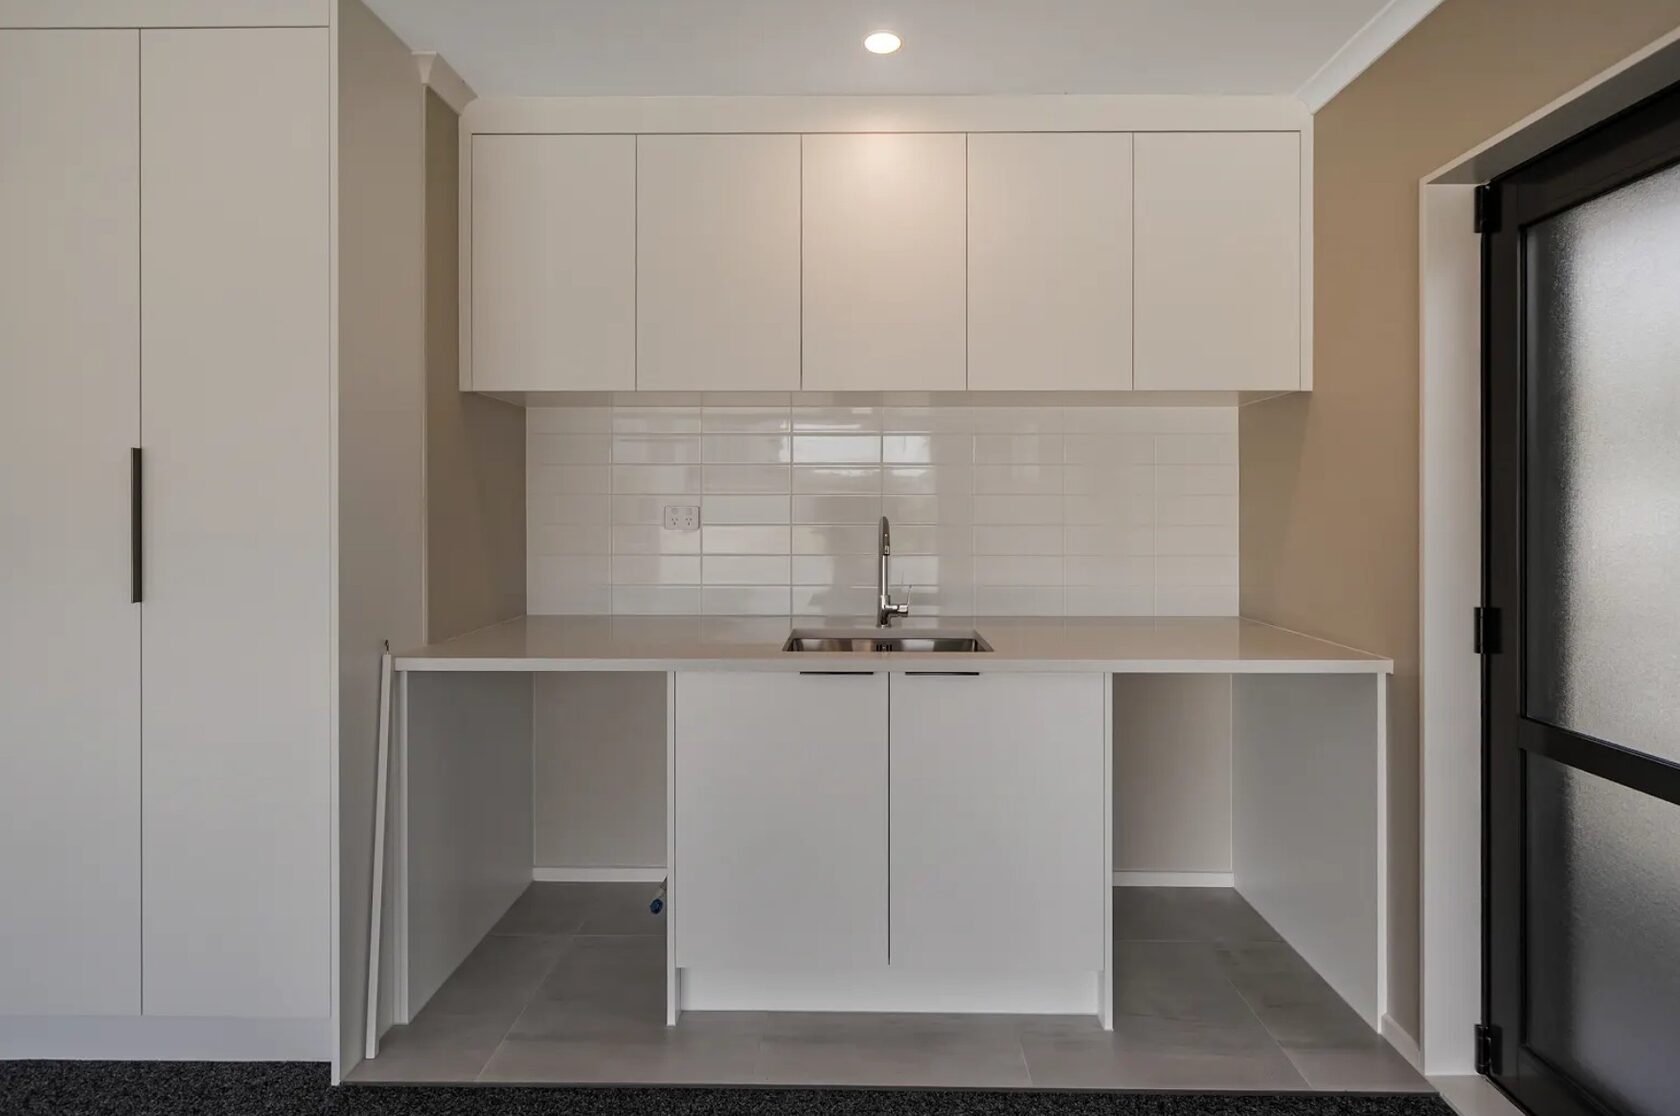
 The laundry also moved beyond its basic steel tub, gaining fitted cabinetry and storage. Elsewhere, the team updated wardrobes with built-in shelving, added garage cabinets and hardwearing garage carpet, and refreshed the home's carpet, flooring, lighting and paint. The owners chose to retain the wall between the living room and family room, so they could still close off one space for privacy. The goal was to improve the home they knew, rather than impose a completely different way of living on it.
Getting home before Christmas
With the owners living elsewhere, the team could coordinate the different trades across the house. James says the demanding part of a project like this is rarely one dramatic problem. It is the many small decisions that have to be made in the right order: checking bathroom clearances, confirming products, scheduling trades and inspecting details before the next stage begins.
There were no major surprises reported during this renovation. A small gap beside the dishwasher needed a return visit and a filler adjustment, but the project stayed on track. The home was finished before Christmas, and the owners moved back in after approximately 11 weeks away.
James recalls that they were “super happy” with the result. They later joined The Renovation Team's Christmas party as guests of honour, a fitting close to a project that had begun with a much smaller plan for the ensuite. The Flat Bush full home renovation project shows the completed rooms and the scope of work behind this story.
For this couple, the biggest change was not a new floor plan. It was being able to use the same long-standing home more easily: pantry drawers they could actually see into, a shower with room to move, storage where it was needed and updated rooms throughout. Their Flat Bush home had changed with them, and it was ready for Christmas.
See the Flat Bush renovation come together
Photos show the finished rooms, but the video gives a fuller sense of how the spaces work together. Take a look around the renovated kitchen, bathrooms and living areas, and see the details behind the changes James describes in this story.
What Auckland homeowners can take from this project
If several rooms are due for renovation, it helps to consider them together before deciding what to build first. That does not mean every home needs a full renovation. It means checking how a decision in one space affects the next, and whether staging the work would bring repeated disruption. James compares planning a full home renovation to planning a wedding: the visible day depends on a great deal of preparation beforehand.
The Flat Bush project also shows the value of keeping what already works. The owners liked the general layout and wanted to retain separate living spaces. Thoughtful changes to storage, doors, fittings and finishes made a significant difference while preserving that choice. You can explore how The Renovation Team approaches full home renovations in Auckland, or watch the Flat Bush renovation video to see the completed spaces.
Flat Bush renovation FAQs
How long did this Flat Bush home renovation take?
+
The owners stayed in temporary accommodation for approximately 11 weeks while work was under way. The team also spent about two months planning before construction began. Those figures describe this project, not a standard timeframe for every Auckland renovation.
Did the kitchen need an extension to feel bigger?
+
No. The team improved the kitchen within its existing footprint by changing the pantry, moving the oven, extending usable benchtop space, closing an unneeded internal window and adding a cavity sliding door. The result made better use of the space already there.
Why did the owners move out during the renovation?
+
The work involved the kitchen, bathrooms and several other areas of the home. Temporary accommodation meant they did not have to live among the dust, noise and steady movement of trades while essential rooms were being renovated. Whether moving out is right for another household depends on its scope, budget and circumstances.
Do you have to change a home's whole layout for a full renovation?
+
No. In this home, the owners wanted to keep the wall between two living areas so they could close one off when they wished. Much of the improvement came from more usable storage, better doors and bathroom fittings, and updated finishes. A renovation plan should start with what works and what does not in the particular house.
If your Auckland home has several spaces that no longer suit the way you live, talk to The Renovation Team about the changes you have in mind.